 by
by Inflatable products, from recreational boats to air mattresses, are incredibly popular due to their convenience and versatility. However, they can be prone to punctures and leaks, which can lead to disappointment if not addressed promptly. This is where inflatable repair kits come into play. This comprehensive guide will explore everything you need to know about inflatable repair kits, including their components, types, and step-by-step instructions for effective repairs.
Understanding Inflatable Repair Kits
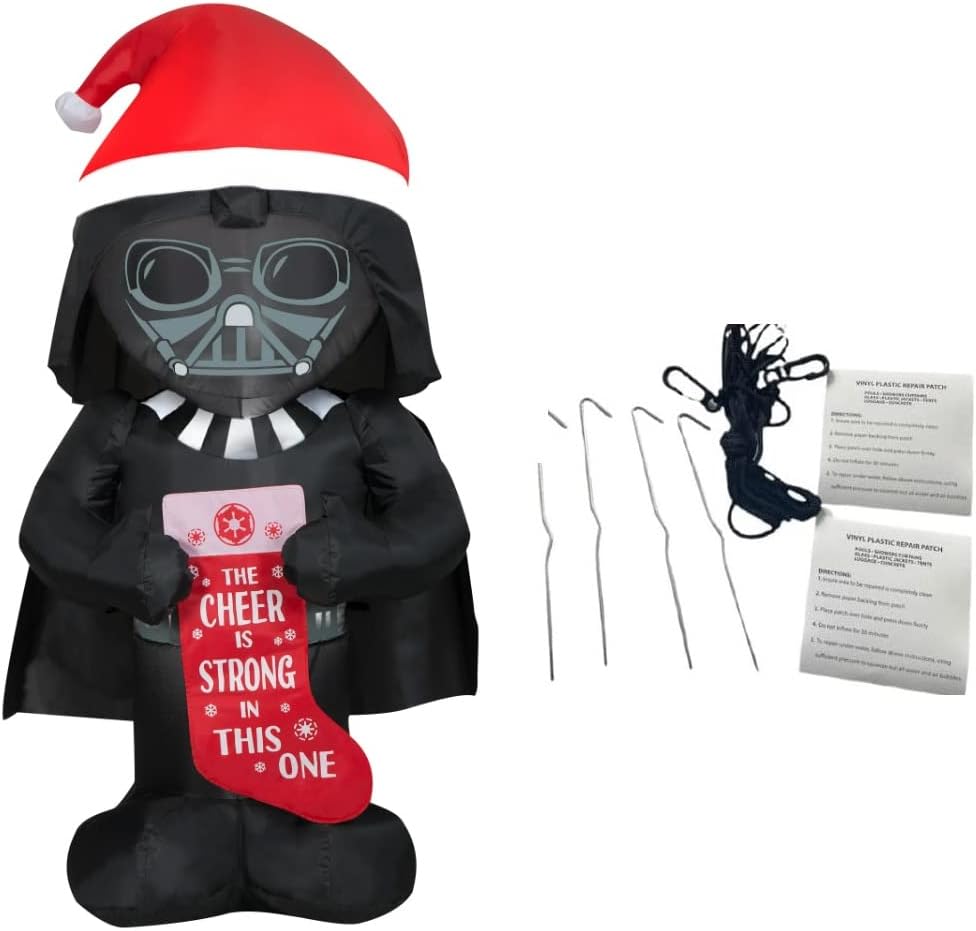
Inflatable repair kits are essential tools designed to help you fix leaks and punctures in inflatable products. They typically contain a variety of components aimed at ensuring a reliable and durable repair. Understanding the elements of these kits will help you choose the right one for your needs.
Components of an Inflatable Repair Kit
While inflatable repair kits can vary in contents, most will include the following key components:
- Adhesive: A strong, waterproof adhesive is crucial for sealing leaks. Some kits include specific adhesives designed for certain materials, such as PVC or vinyl.
- Patch Material: This is typically a piece of fabric or material that matches the inflatable’s surface. It is used to cover the damaged area securely.
- Application Tools: Some kits come with applicators or brushes to help apply the adhesive smoothly.
- Sandpaper: Used to prepare the surface before applying the patch, ensuring better adhesion.
- Instructions: A guide is often included to provide step-by-step directions for the repair process.
Types of Inflatable Repair Kits

There are several types of inflatable repair kits, each designed for specific applications. Understanding these differences will help you select the right kit for your needs.
1. General-Purpose Repair Kits
These kits are versatile and can be used on a variety of inflatable products, from pool toys to air mattresses. They typically contain a universal adhesive and patches suitable for different materials.
2. Specialty Repair Kits
Specialty kits are designed for specific types of inflatables, such as:
- Boat Repair Kits: These often include marine-grade adhesive and patches made from durable materials designed to withstand water exposure.
- Camping Gear Repair Kits: Tailored for inflatable sleeping pads and tents, these kits may contain lighter materials for quick fixes.
- Sports Equipment Repair Kits: Designed for inflatable sports gear like balls and pool floats, they often include smaller patches and adhesives suitable for thinner materials.
Why Repairing Inflatable Items is Important
Repairing inflatable items rather than replacing them can have several benefits:
- Cost-Efficiency: Repairing a punctured air mattress or inflatable pool is often much cheaper than purchasing a new item.
- Environmental Impact: Reducing waste by repairing products contributes to a healthier planet.
- Convenience: Knowing how to repair your inflatables can save you time and hassle, especially during vacations or events.
Step-by-Step Guide to Repairing Inflatable Products
Now that you understand the components and types of inflatable repair kits, let’s dive into the step-by-step process of repairing a punctured inflatable item.
Step 1: Locate the Leak

Before you can repair, you need to find the leak. Here are a few methods to locate it:
- Visual Inspection: Look for any visible punctures or damage.
- Water Test: If the inflatable is large enough, submerge it in water and look for bubbling.
- Soapy Water Test: Mix soap and water, apply it to the suspected area, and look for bubbles forming.
Step 2: Prepare the Area
Once you’ve located the leak, clean and prepare the area around the puncture:
- Use a damp cloth to clean the area, removing any dirt or debris.
- Sand the area lightly with sandpaper to create a rough surface for better adhesion.
Step 3: Apply Adhesive and Patch
Following the manufacturer’s instructions, apply a thin layer of adhesive to both the patch and the damaged area. Here’s how to do it effectively:
- Ensure even coverage without excessive glue oozing out.
- Press the patch firmly onto the damaged area, ensuring no air bubbles are trapped underneath.
- Use an applicator or your fingers to smooth out edges.
Step 4: Allow to Cure
Let the adhesive cure for the recommended time as indicated in the instructions. This period can range from a few hours to a full day, depending on the type of adhesive used.
Step 5: Test the Repair

After the curing period, inflate the item and check for any signs of air escaping. If everything seems secure, your repair is successful!
Case Studies: Success Stories Using Inflatable Repair Kits
To illustrate the effectiveness of inflatable repair kits, here are a couple of case studies:
Case Study 1: Family Camping Trip
A family on a camping trip discovered a leak in their inflatable sleeping pad. They used a general-purpose repair kit, followed the steps to patch the hole, and successfully repaired the pad. The family was able to enjoy a comfortable night’s sleep without having to buy a new pad, showcasing the kit’s efficiency and practicality.
Case Study 2: Recreational Boating
A group of friends faced a leak in their inflatable boat during a lakeside outing. They applied a marine-grade patch from their boat repair kit and were back in the water within hours. This quick fix saved their day on the lake, demonstrating the importance of having the right tools on hand.
Statistics on Inflatable Product Usage and Repair
Understanding the prevalence of inflatable products can highlight the importance of repair kits:
- According to a survey by the Outdoor Industry Association, over 30% of American households own at least one inflatable product.
- The inflatable boat market is projected to grow by 4.5% annually, increasing the demand for repair solutions.
- Research shows that more than 60% of inflatable product owners have experienced a leak at some point, underscoring the need for effective repair kits.
Conclusion: The Value of Inflatable Repair Kits

Inflatable repair kits are essential tools for anyone who owns inflatable products. Understanding their components, types, and repair processes can save you time and money while keeping your inflatables in top condition. With the right kit and knowledge, you can ensure that punctures and leaks do not put a damper on your outdoor adventures or leisurely activities. Whether you’re camping, boating, or just enjoying a day at the pool, being prepared with an inflatable repair kit will keep your inflatable products functional and enjoyable for years to come. Investing in a quality repair kit today could be the best decision you make for your inflatable items.


